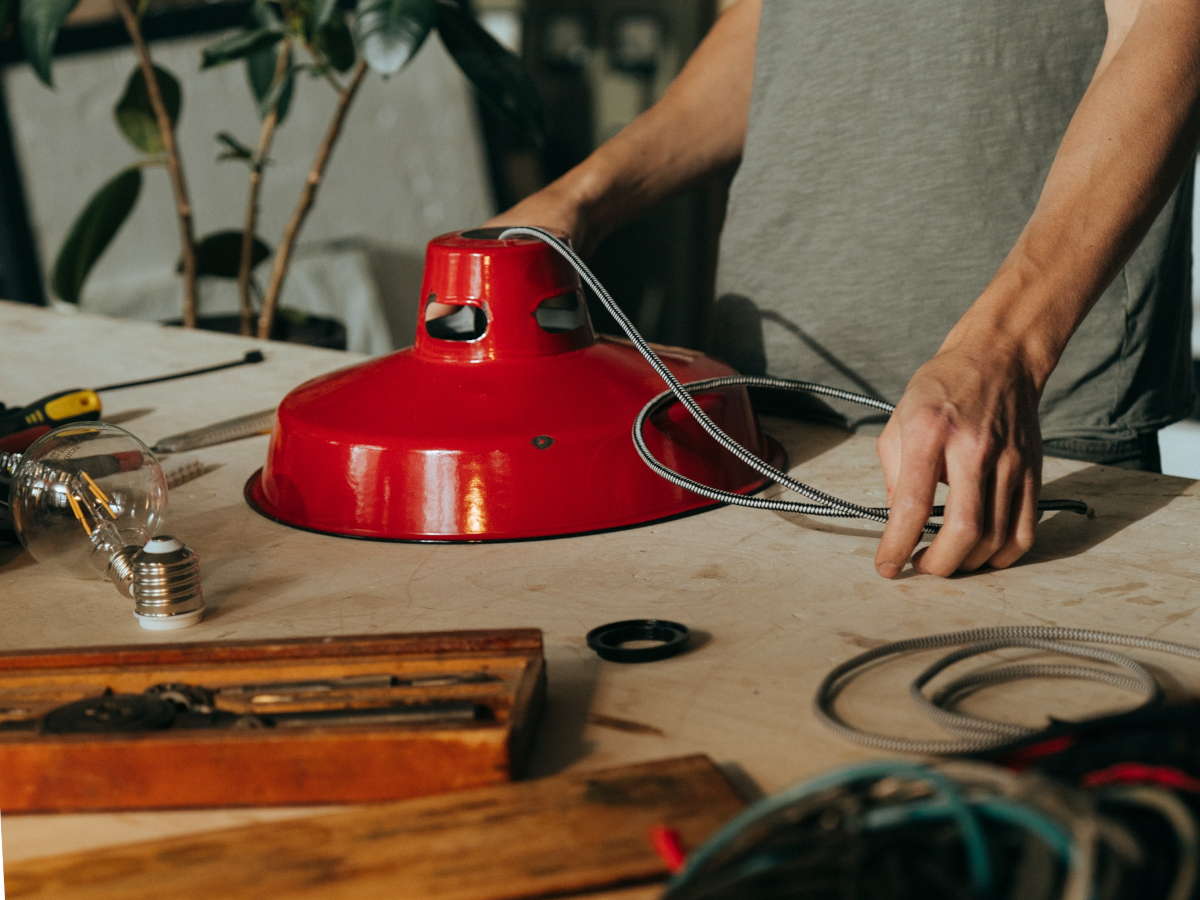
Repairing a table lamp is among the easiest DIY lighting projects you can do. It can add a few years to your failing lamp, and you can also update it to match your changing style.
If you have been thinking of replacing your lamp entirely, a few minutes could be all it takes to save you money.
In our post today, we dive deep into the most common problems and show you how to repair a table lamp.
Looney lumens is reader-supported and participates in the Amazon Associates Program. When you buy a product through links on our site, we may earn a small commission, at no extra cost to you.
The Anatomy Of A Table Lamp
At its most basic form, a table lamp is a simple electrical circuit made of a bulb socket, a conductive cord, and a power plug.
Electricity travels through the brass in the plug, into the conductor’s hot wire, reaches the alloys in the bulb through the socket, and then returns via the neutral wire.
Somewhere along with the circuitry is a switch, which can complete or break the circuit.
Switches come in different forms. A pull-chain switch is a toggle switch installed in the bulb socket and actuated by a chain or string. Meanwhile, a push-through switch breaks the electricity flow at the base of the socket when it is pressed.
Some lamps have turn-knobs instead of pull and push switches. You can turn the knob to switch the lamp on and off or change the brightness.
Besides the plug, cord, socket, switch, and bulb, a lamp can have accessories like a lampshade to soften the light. A harp to support the shade, and an insulation sleeve to secure the socket to the lamp frame.
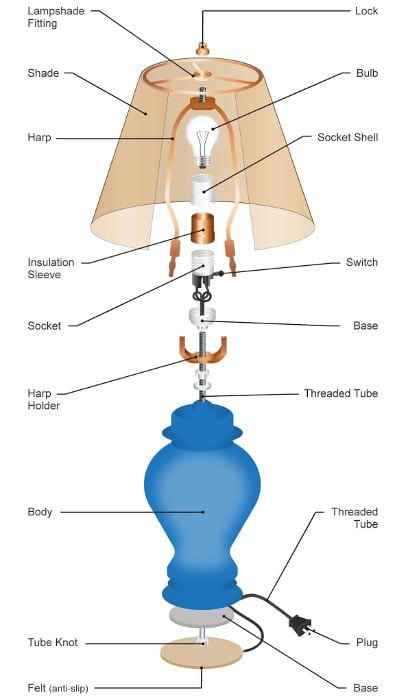
Credit: homestratosphere.com
Most lamps feature anti-slip material at the base to keep them in place and protect the table’s surface from scratches.
Common Table Lamp Issues
If you try switching on your table lamp and is non-responsive, dim, flickering, or any other abnormality, the chances are high that it needs a repair.
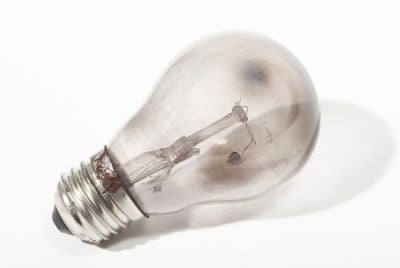
yes, this light bulb is definitely burned
The most obvious problem could be that the bulb is not receiving power. A burnt bulb is another likely scenario.
The lamp socket might also have a blockage or damage that prevents it from completing the bulb’s connection.
A table lamp can fail if the switch malfunctions. A switch that does not produce a clicking noise when pressed or turned is likely faulty.
If the table lamp seems intact, the problem could be a damaged power cord or a faulty plug.
Troubleshooting Table Lamp Problems & How To Fix Them
A lamp is an uncomplicated piece of technology.
With the right tools and some time on your hands, you can fix most, if not all of the common table lamp issues yourself. Of course, a comprehensive guide such as this one will come in handy.
Read on for a deep dive into how you can cure the common ailments that table lamps suffer from.
Safety tip
Before you start disassembling the lamp, always unplug your lamp from the power outlet!

1. A burnt Bulb Or A Faulty Power Outlet
In any repair job, especially one where you are not exactly sure where the problem could be, it is advisable to start with the basics.
Before you reach for your electrical tool kit, confirm that the light bulb is not burned out. You can try fitting another bulb on the lamp or plugging the bulb in question into a working socket.
Also, confirm that the power outlet you are using has power. Plug in a different device, say, your mobile phone, and see how it responds.
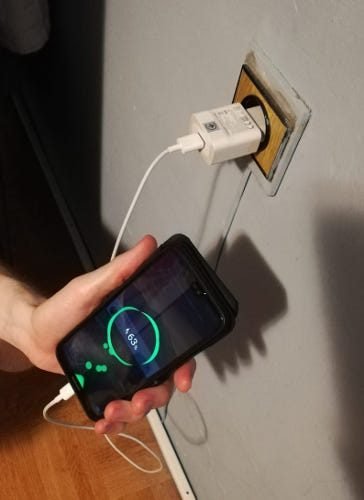
2. A Broken Power Cord
If both the bulb and electric socket are alive and well, move on to the power cord. Inspect it for any damage. A broken cord does not have to look damaged on the outside.
For conclusive results, it is best to test continuity with a multimeter.
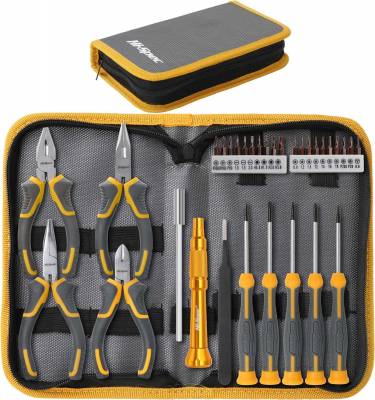
Tools needed:
A set of standard star and flat-bed screwdrivers.
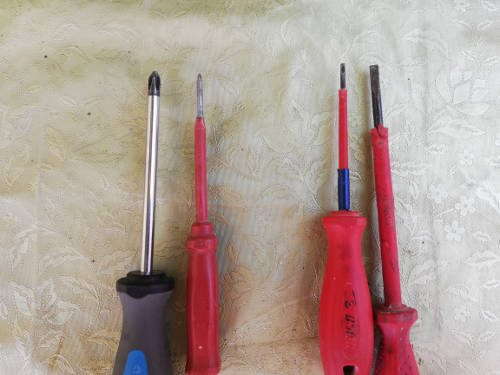
Pliers.
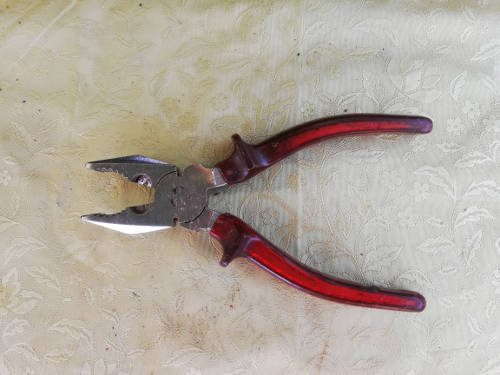
Wirecutters

A sellotape
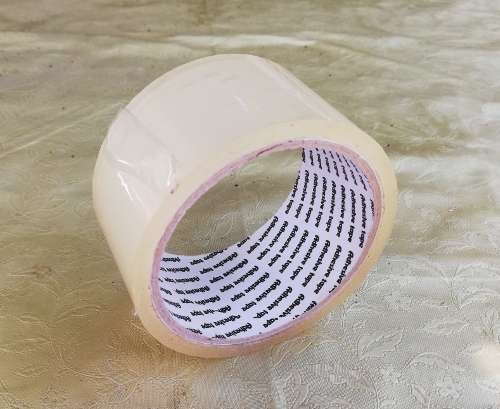
Multimeter.

Hand-picked for you on Amazon:
Detaching The Cord
To fix and replace your broken power cord, you will need to detach it from the lamp’s socket, switch, or both.
Detaching the cord from the bulb socket
The power cord is usually connected to the lamp’s socket by screws. You can get to these screws by separating the socket.
1. Unplug your lamp from the power outlet and move it to a large, flat, and well-lit surface. Remove the bulb and the lampshade.
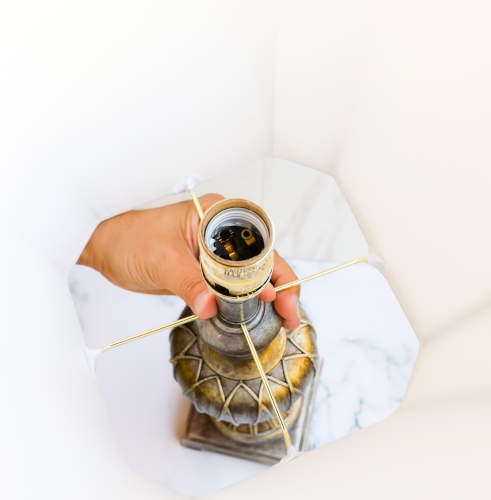
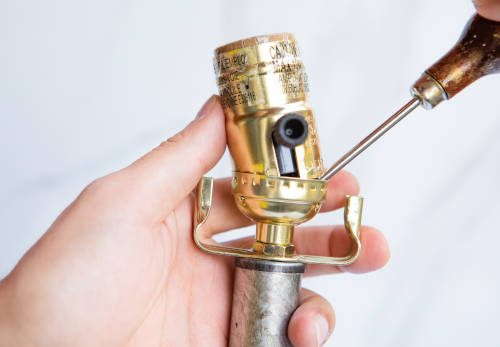
2. Detach the bulb socket from the lamp. Depending on your lamp, the socket may be held on by a screw or nut. Use a screwdriver or pliers to pray it out.
If removing the socket is not straightforward, leave it. You can still remove the cord.
3. Hold the socket’s base with one hand, wiggle, and pull the top with the other hand to free it. Separate the base and top far enough to see the wire terminals.
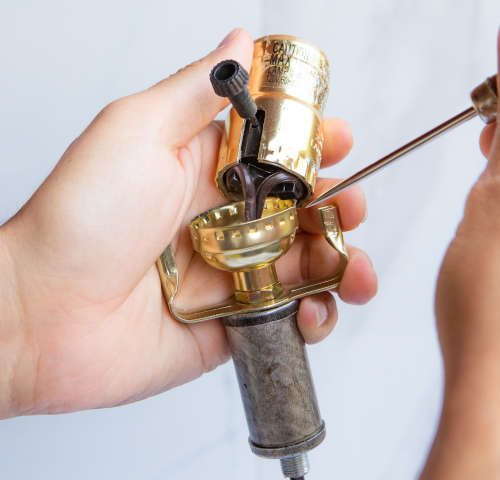
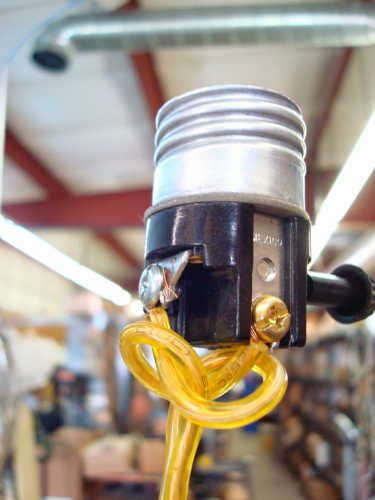
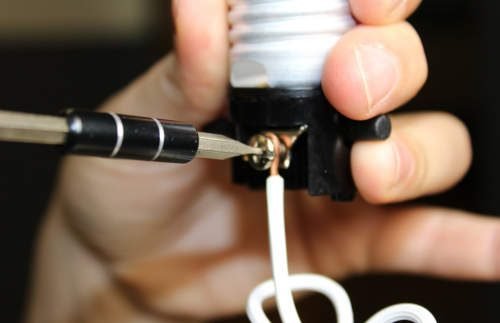
4. Unscrew the exposed terminals’ screws to release the cord.
Please note that not every model will have exposed screws. This could be a problem and you would need to buy a new lamp if the cords are broken.
Our model, unfortunately, doesn’t have exposed screws but it would look something like in the photo.
5. If the cord was damaged closer to the bulb socket, you can pull it through the top, expose the damaged area and cut it off.
Detaching the cord from the power plug
You can opt to open up your lamp’s power plug if the cord damage is closer to the plug than the socket or is in a region that requires complete cord replacement.
If your lamp’s plug is the sealed rubber type without any visible screws, your only option is to cut it off and replace it with another replaceable plug.
If the plug has some screws, use a matching-size screwdriver to loosen them.
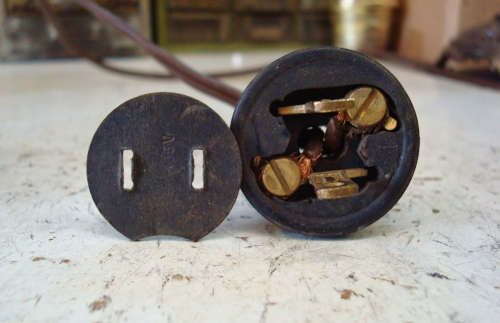
Once loose, lift the plug’s top cover to expose the wiring. Typically, the ribbed wire (neutral) will be connected directly to the plug while the smooth wire (hot) will connect to the plug through a fuse.
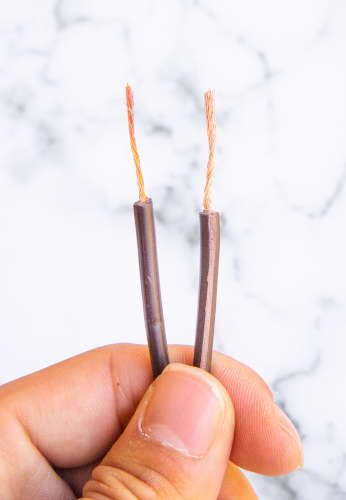
Loosen both of the screws holding the wires in place to disconnect the cord. Our power plug cannot be unscrewed but it will look something like this:
Now that the cord is free, you can pull it out and set the plug aside.
Pro tip
To simplify threading a new cord through your lamp, use sellotape to join the new cable to the old one before you pull it out.
As you pull the old cord out, the new cord will be easily threaded through the opening in the lamp or plug.
Testing For Continuity
If the damage to the cord is not obvious, use a multimeter to check its continuity.
Set the multimeter on Continuity mode. Look for a diode symbol with waves propagating around it.
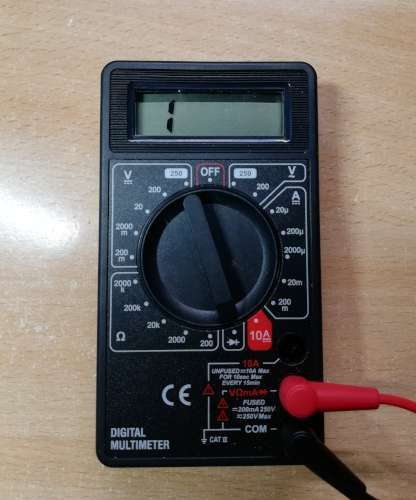
2. Touch the multimeter probes together to test. The instrument should beep to indicate that the connection is complete.
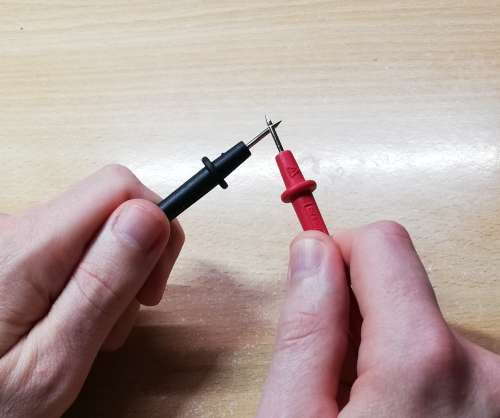
3. Place one probe on one of the cord’s wires and hold it there with one hand. Use your other hand to place the other probe on the same-color wire on the other end of the cord. Note that some cords may have different colors on them.
Repeat the same with the other wires.
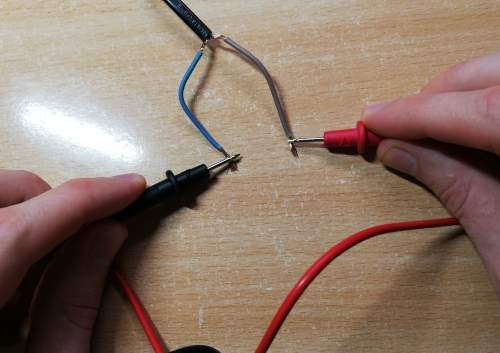
4. If you do not hear a beep with one or both of the cord’s wires, you can conclude that it is broken.
Fitting A New Cord
Now that you have removed the damaged cord, it is time to fit in a new one. Your closest electrical accessories shop should have a suitable replacement.
Alternatively, you can go through your old electricals and salvage an unused power cord. Remember to test for continuity before you used a salvaged cord.
Thread the cord through the top of your lamp and pull it out from the bottom. Continue pulling until you have achieved the cord length you want.
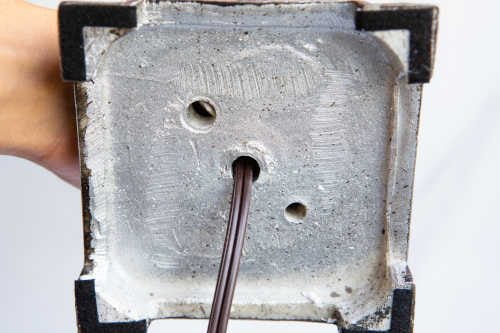
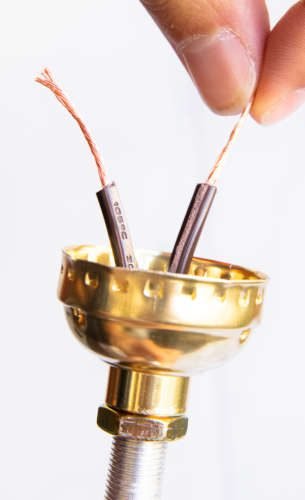
Cut off the remaining piece of cord at the top of the lamp, leaving about three inches of cord exposed. Use your pliers to peel off the insulation on both ends of the cord and expose about half an inch of the copper wires.
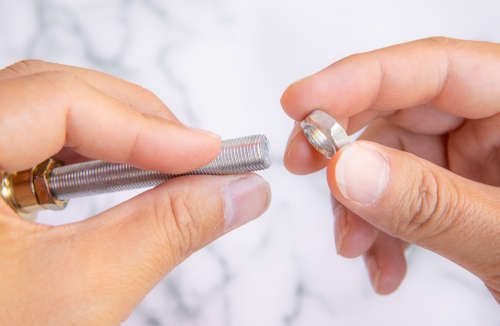
Many table lamps have a nipple and lock nut to secure the socket to the cord, and a check ring to hold the socket firmly on top of the lamp frame.
If you had removed these parts, pass the cord at the top through them. The check ring should go first, followed by the nipple, and finally, the lock nut. Turn the nut quarter-way through the nipple. About two inches of the cord should stick through the nipple.
Click the link for the video instruction on “How to Tie an Underwriter’s Knot“.
With the knot tied, inspect both conductors at the end of the wire. Wrap the ribbed conductor around the silver screw of the socket. Connect the other wire to the brass-colored screw. Fasten both screws and ensure the conductors are securely under the screw head.
Again, our socket doesn’t have exposed screws but it would look something like in the picture provided.
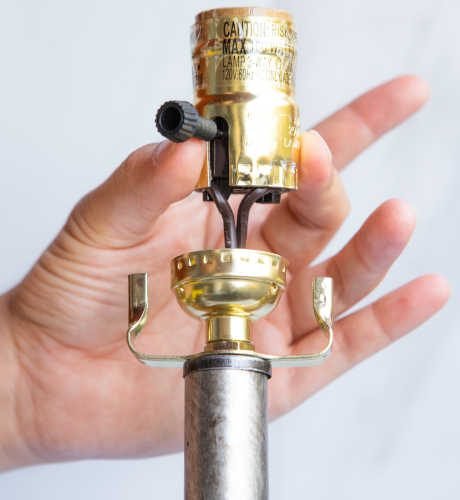
Place the socket’s top into its base. If it had a screw to lock it in place, tighten it. Otherwise, snap it into position. Listen for a click to signal that the shell is locked correctly. The top and base should lock together to form one piece.
Thread the complete socket around the nipple to fit it firmly on the lamp.
With the socket reconnected correctly, turn your attention to the plug. Connect the ribbed conductor to the plug’s neutral pin and the smooth wire to the live (fused) pin. Fasten the screws back in place to grip the two wires firmly in place.
Finally, place the cover back on top and tighten the screws at the plug’s base to hold it.
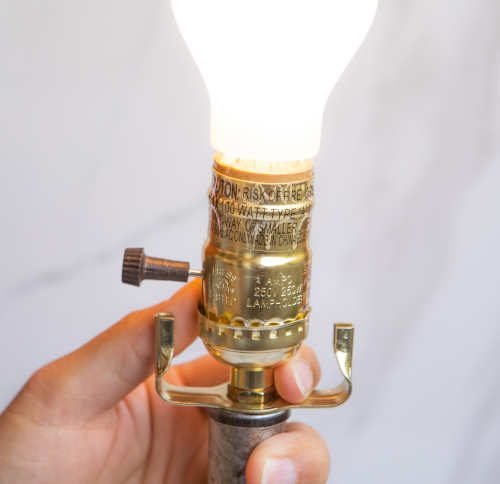
With the new cord installed, test your workmanship with a bulb. If the light comes on, your work is done.
3. A Faulty Socket Or Switch
If your cord passed the continuity test, you would not remedy the lamp’s problem by replacing the cord. So, turn your attention to the bulb socket.
A fault in a lamp socket results from a breakdown of the switch inside the socket rather than the socket itself. Either way, replacement is the only option.
Replacing A Switched Socket
- Pop the socket out from its base with a wiggle. If it is fastened with a screw, loosen it with a screwdriver.
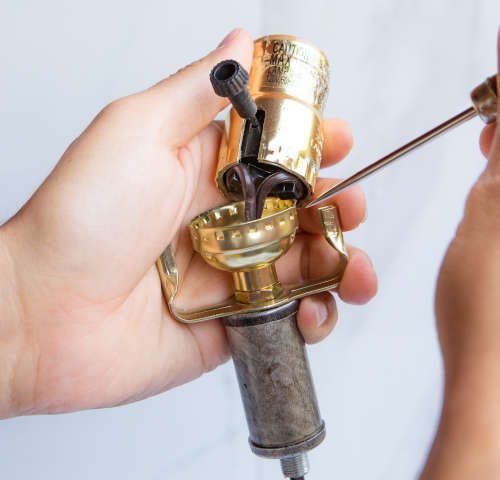
2. Loosen the screws that hold the cord to the socket’s terminals and release the socket.
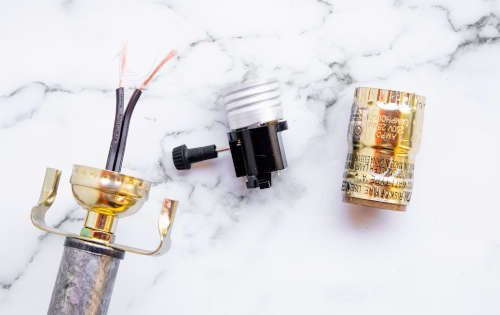
3. When connecting the new socket, re-trim the bare ends of the cord. They will have the thin strands of wire likely broken off. Instead, trim the exposed wire and strip the insulation from a fresh piece of wire using pliers or a wire stripper.

4. Connect the cord to the new socket. The neutral (ribbed) wire must go to the silver screw and the hot (smooth) wire to the brass screw.
5. With the cord intact, refix the socket onto the lamp and test it with a bulb.
Replacing A Cord Switch
1. Examine your new switch to note the wire arrangement. Some switches only require you to connect the hot wire. These have a ridge along one side for the neutral wire to run through.
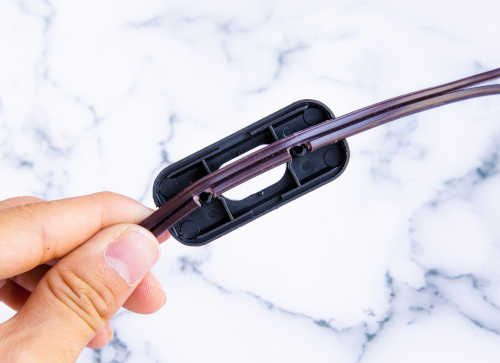
2. If your lamp has a cord switch, you need to remove it to install the new one. You can open the switch’s casing to remove the wires or use wire cutters to cut the cord on both ends of the switch.
3. If you are installing a cord switch where there was not one before, split the area where you want the switch to go with a small knife. Cut through the hot wire or both the hot and neutral wires, depending on your switch.
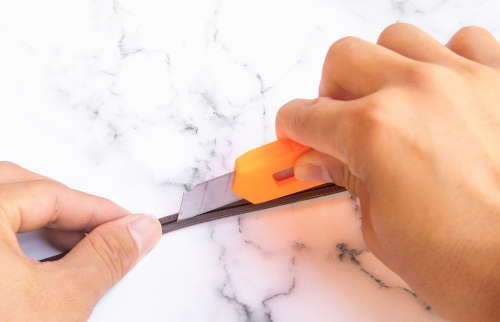
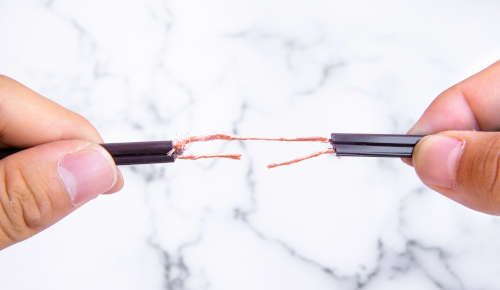
4. With your wire cutters, strip about half an inch of insulation from the wires.
5. Match the wires to the appropriate screws. If you have only one screw, attach the hot wire. If you need to connect both wires, the hot wire will go to the brass screw and the neutral to the silver screw.
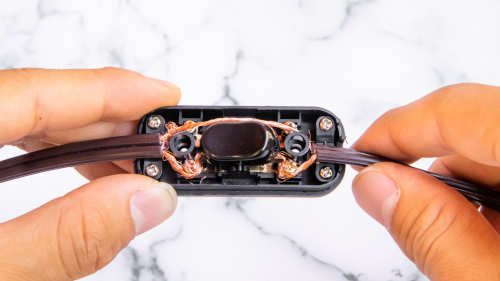
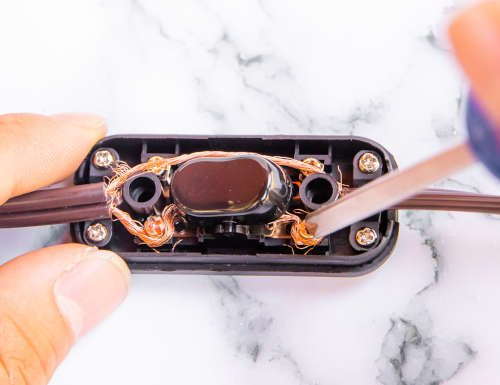
6. Use your fingers to wrap the exposed ends of the wires around the screws, leaving only the cord’s insulated parts exposed. Tighten the screws.
7. Close the switch cover and snap or screw it shut.
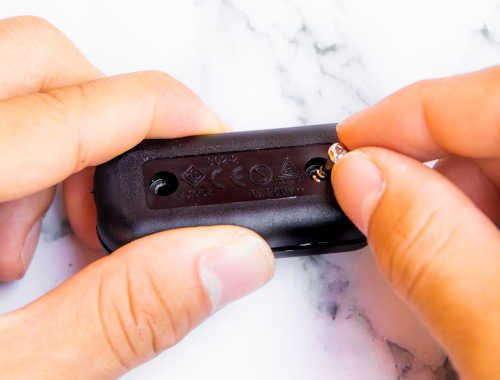

8. Plug your lamp into the power outlet and test the new switch.
If the switch works, you can rest proudly, knowing you fixed it all by yourself. If it does not, you may need to dismantle the lamp again and re-check the wiring.
Table Lamp Repair Tips & Tricks
Repairing a table lamp is not difficult. To ensure your success, however, you must keep several things in mind.
For starters, before you dive into repair work, examine your lamp carefully. If it has not been serviced for a long time, chances are high that the cord and insulation rubbers may need replacing.
Electrical faults may have also occurred, burning the wires. In such situations, you must get new wires for the job.
Repairing a table lamp means interacting with electrical pathways. So, while these lamps are generally safe devices, ensure you have disconnected the plug from the power outlet before you start working.
Additionally, pay close attention to how you disconnect and reconnect wires, sockets, and switches. A wiring mistake can cause significant damage.
Frequently Asked Questions:
Is It Safe To Leave A Table Lamp On At Night?
Electric table lamps are generally safe devices. However, traditional incandescent lamps get significantly hot over time. A decorative lampshade with clothing that could become loose and fall on the hot bulb can create a problem.
How Long Can A Light Bulb Stay On Safely?
It is impossible to judge precisely how long a bulb can last before it becomes unsafe. This timeline depends on various factors, including the type of bulb and the ambient temperature.
What is well known is that the danger increases with the amount of heat a bulb emanates. LED bulbs are highly efficient at turning energy into light. They can, therefore, remain on safely for 24 hours a day, 7 days a week.
On the other hand, incandescent bulbs produce 90 percent heat and 10 percent light. They get hotter the longer you leave them on, and they can overheat, melt their internal components, and cause a fire.
The risk is even higher if an incandescent bulb is covered by a lampshade, limiting air circulation. You must never leave these bulbs on for extended periods.
Other Useful Links
External Links
- https://www.lamppartsrepair.com/p/common-repair-tips.html
- https://www.dummies.com/home-garden/home-improvement/electrical-wiring/how-to-repair-a-faulty-lamp/
- https://www.theguardian.com/lifeandstyle/2014/aug/25/how-to-mend-a-faulty-table-lamp
- https://www.ifixit.com/Guide/Table+Lamp+Cord+Replacement/53791
David Herold

Hey there! My name is David, a Technical Writer and Content Marketing Manager specializing in IT/software (cloud services, cybersecurity, AI, Kubernetes and containers, IoT, blockchain, cryptocurrencies, programmatic advertising), engineering, and FinTech topics.
