Greetings to the DIY lamp crowd! Today, we’re bringing you a simple guide on how to make desk lamps out of commonly available things to brighten up your house and life.
Unfortunately, we frequently see DIY lamp projects that require complex procedures or professional assistance. But don’t worry; this guide ensures that even a novice can make these lamps.
Here we will design different lamps that are functional, aesthetic, and, most importantly, easy to make.
Looney lumens is reader-supported and participates in the Amazon Associates Program. When you buy a product through links on our site, we may earn a small commission, at no extra cost to you.
Tools and materials
We’ll be making lamps with different items, such as
Most of these items would already be available at your homes. At the same time, the rest can be easily obtained from the market at very reasonable prices.
You can use leftover liquor bottles and cans. Mason jars are also available at very affordable rates. Pieces of wood are also no exception in terms of prices. You can also use small branches of trees to make lamps.
A few other things that we’ll be needing are:
Let’s get to work! ☺️
A word of caution and a disclaimer
Electrical current and the tools used in these guides can cause harm.
Please make sure to follow basic safety while working with any kind of tools, materials, and electrical equipment. If you are planning to make these with kids, then make sure you will give them proper adult guidance and supervision.
Remember: Following these guides is at your own risk and ultimately you are responsible for your own safety.
How Do You Make a Wooden Desk Lamp?
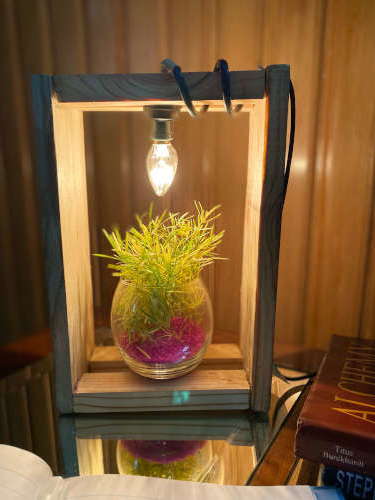
Let’s begin by making a wooden desk lamp that is simple to make and still looks beautiful on your desk. This lamp will amp up your space and have people asking you where you got it from.
The things that you’ll need for this lamp are:
- Wooden pieces (2 side pieces: 9’’x3.5″ and 4 small for top and bottom 5’’x2″)
- Glue Gun
- Sandpaper
- Light Bulb
- Light Bulb Socket with cords
- Hammer and nails (optional, in case you want to use this instead of the glue gun)
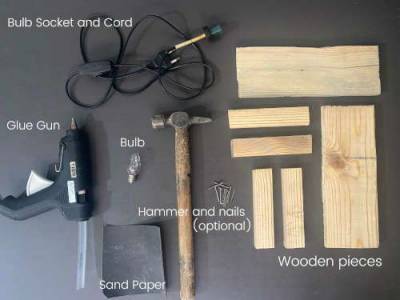
Let’s get to work:
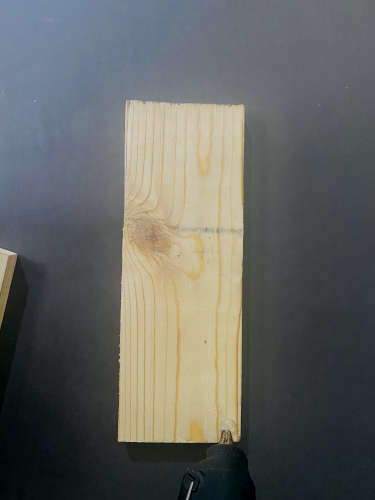
Step 1:
The first thing you need to do is sandpaper all the edges of your wooden pieces to make sure they are smooth.
Step 2:
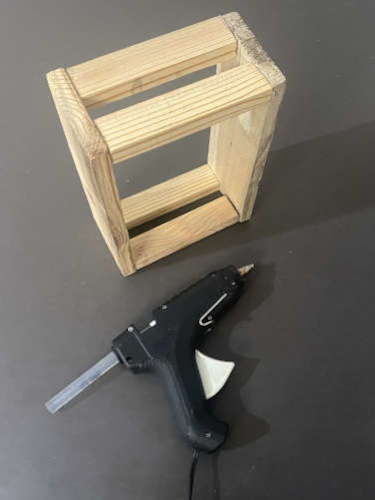
Now, take the bigger wooden piece and join the smaller pieces on all four of its corners using the glue gun.
Safety tip!
Melted glue is hot, do not touch it!
When hot glue sticks to your fingers, it causes nasty burns.
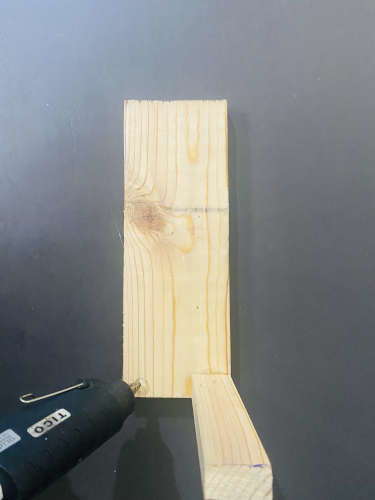
Step 3:
Now, join the other bigger piece with the smaller pieces in the same way and glue it down. (I kept a hammer and nails with me in case it didn’t hold well with the glue, but it actually bonded very strongly. Hence, I ended up using glue only).
Step 4:
- Insert the light bulb socket from the top.
- Wrap the cord around.
- Attach the bulb carefully.


Now light it up, and voila!
We’re done with our beautiful wooden desk lamp. Put it up on your desk and get ready to wow everyone with your new desk lamp. I also added a small plant underneath the bulb to make it even more aesthetic.
How To Make a Desk Lamp Out Of a Liquor Bottle?
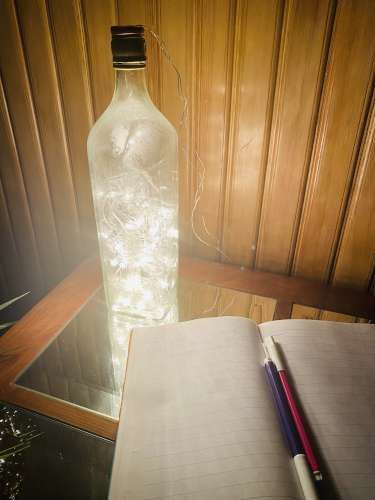
Isn’t it wonderful if you can make the best use of the things you use every day? It’s both economical and sustainable, which is good for both your wallet and the environment. This is why we’re bringing you the guide on making a desk lamp out of a liquor bottle.
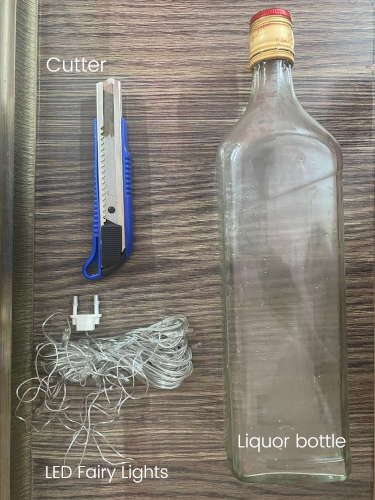
The things that you’ll need for this lamp are:
- A liquor bottle and its lid
- LED fairy lights
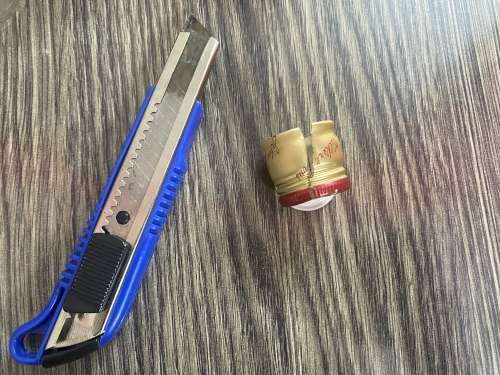
- Utility Knife/Cutter
Let’s get to work:
Step 1:
(optional step) Peel the label off your liquor bottle if you want a plain or customized bottle. But if you want a rustic feel on your lamp, you can totally skip this step.
Step 2:
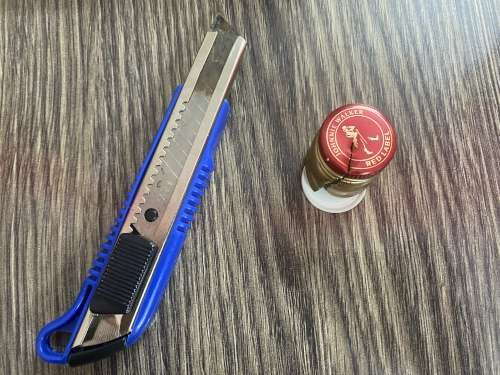
Poke a hole in the center of your lid and then incise the lid from one side.
Step 3:
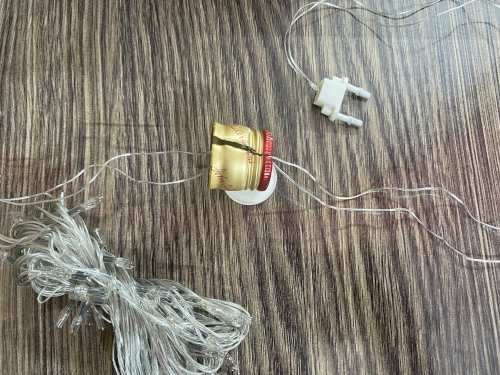
Now, insert the cords of the LED lights into the lid from the side that has been cut.
Step 4:
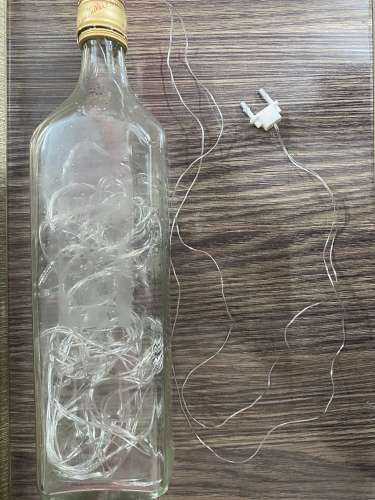
Put your LED lights into the bottle and close the lid leaving the light plug out.
Step 5:
Now turn on the LED lights and enjoy this delightful lamp that gives fairytale vibes.

How To Make a Desk Lamp With a Tin Can?
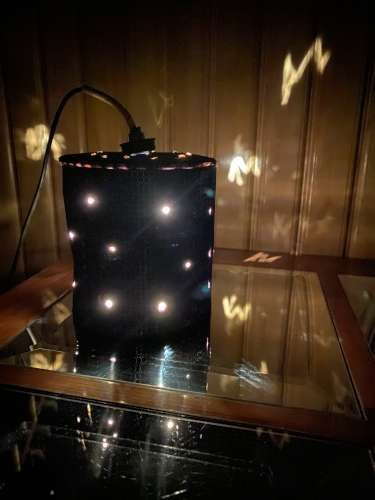
Let’s get your creative juices going and create a tin can lamp.
Tin cans are one of those things that one can find easily in homes. So, the next time you see a tin can lying around, just pick it up and upcycle it into a desk lamp.
The things that you’ll need for this lamp are:
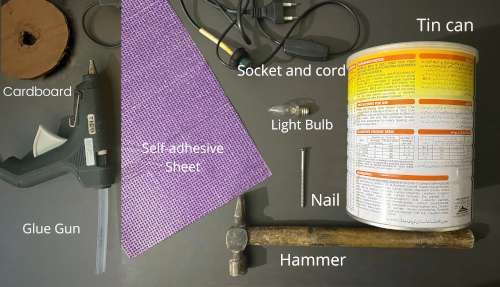
Let’s get to work:
Step 1:
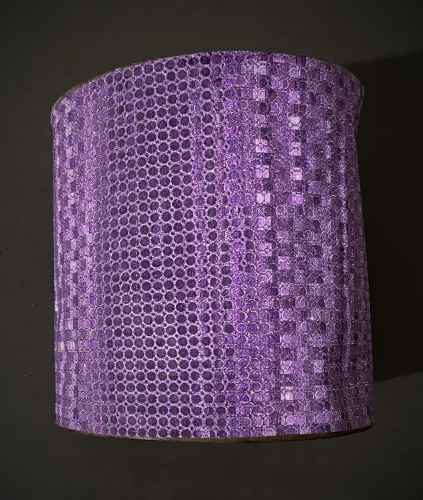
Take the can and cover it with a self-adhesive fabric sheet. You can add a coat of spray paint instead of this sheet as well to protect it.
Step 2:
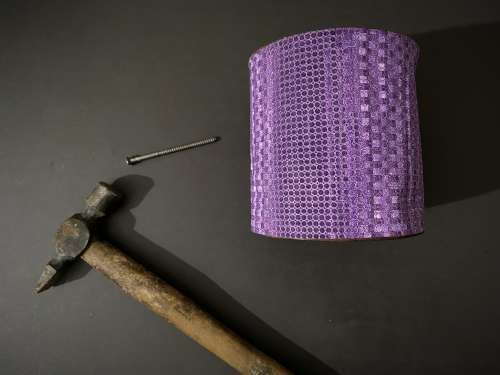
Mark the points where you want to make the holes.
Step 4:
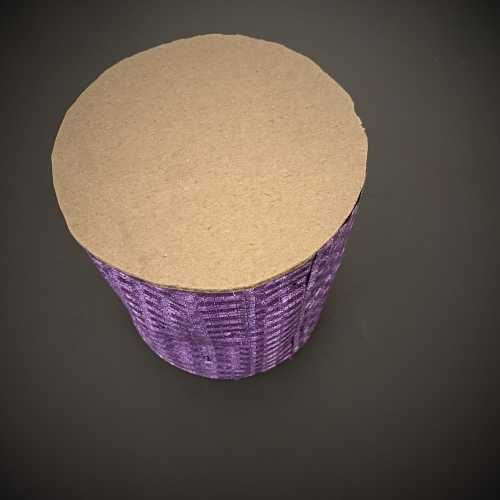
Cut a piece of cardboard about the size of the can.
Cut another circle within for the bulb socket to pass through.
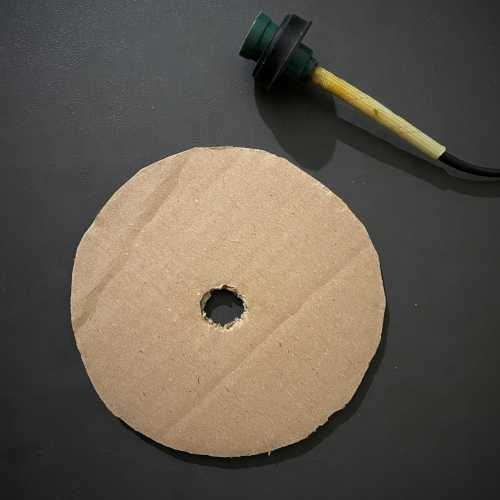
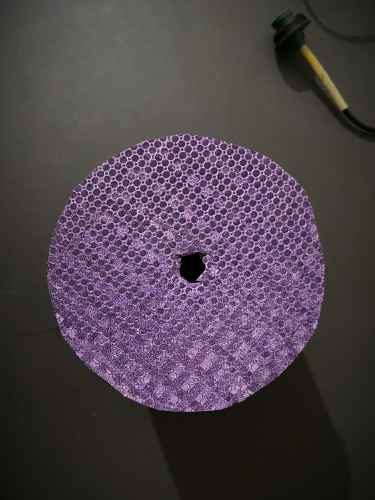
Cover this piece of cardboard with the same self-adhesive sheet.
Or you can make a hole at the bottom of the can for the bulb socket and cords to pass through.
Step 5:
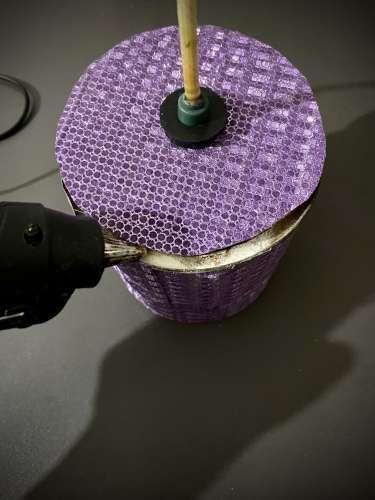
Attach the bulb socket to the cardboard and set the light bulb toward the inside of the can.

Step 6:
Attach the cardboard to the can using the glue gun.
Final Step:
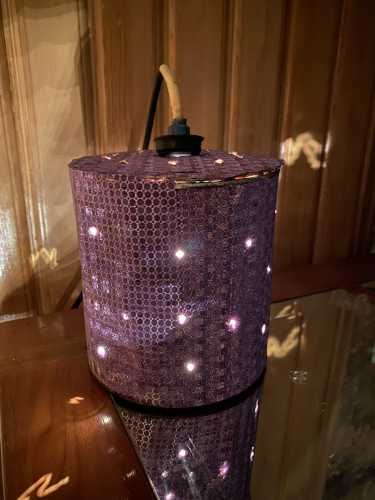
Turn on the light bulb, and your DIY tin can desk lamp is ready to shine!
Also, if you don’t want to set up electric bulbs in it, you can light a candle or put battery-powered LED lights in your tin can and enjoy the beautiful light peeking through it.
How To Make a Mason Jar Desk Lamp?
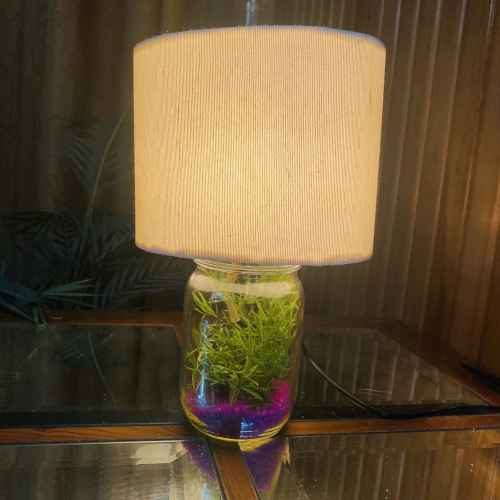
What’s an excellent DIY project blog that doesn’t include a classic mason jar? Mason jar lamps are easy, cheap, and hassle-free, yet they look really fantastic.
These lamps can be made with a lampshade or without one. The best thing about DIY projects is that they can be highly customizable, and you can make them with the things that you like or are available to you.
So, let’s begin!
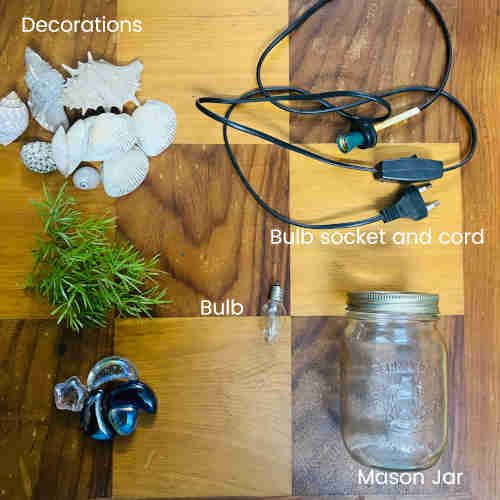
The things that you’ll need for this lamp are:
- Mason jar
- Light bulb
- Light bulb socket and cord
- Decorations (optional)
- Lampshade (optional)
Let’s get to work:
Step 1:
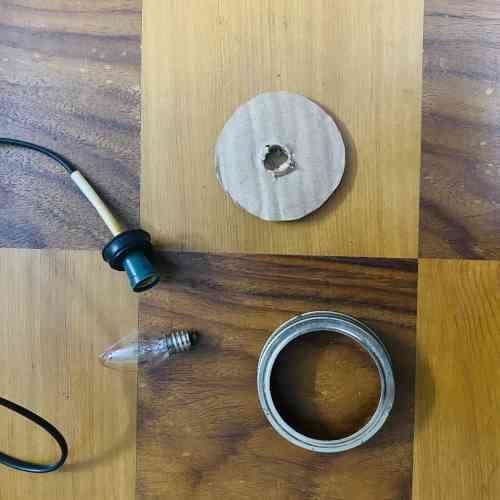
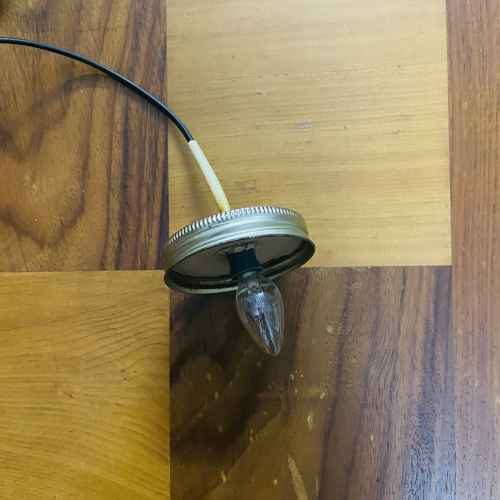
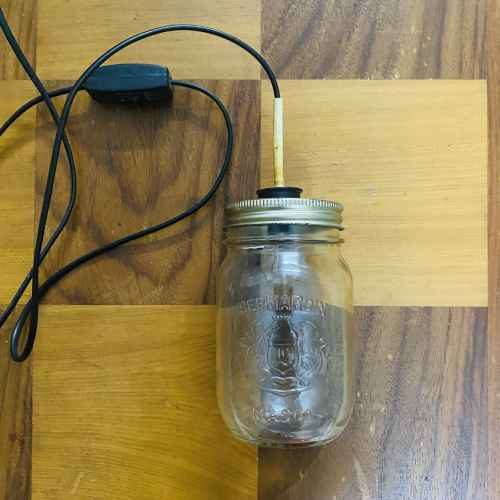
Insert the light bulb socket and cord through the cardboard/lid toward the inner side of the jar. Now, add the bulb to it.
Step 2:
Remove the mason jar’s lid and poke a hole in it for the bulb socket. (I’m using cardboard instead of the inner part of its lid.)
Step 3:
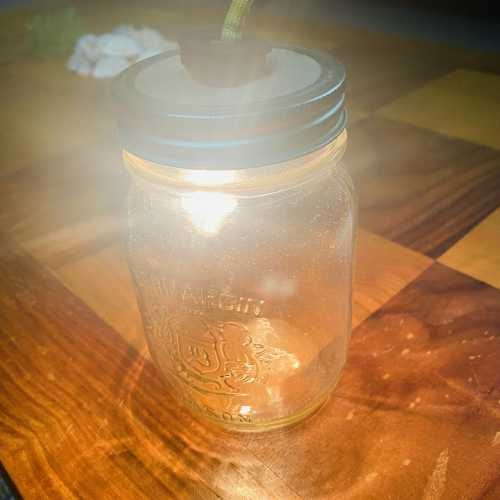
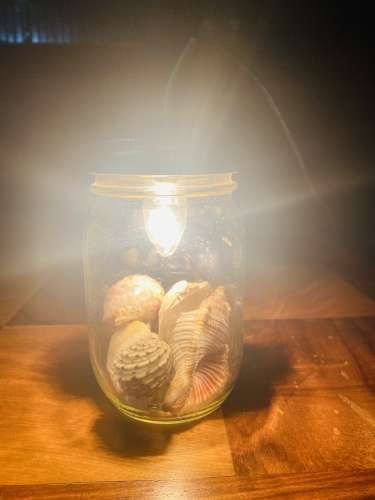
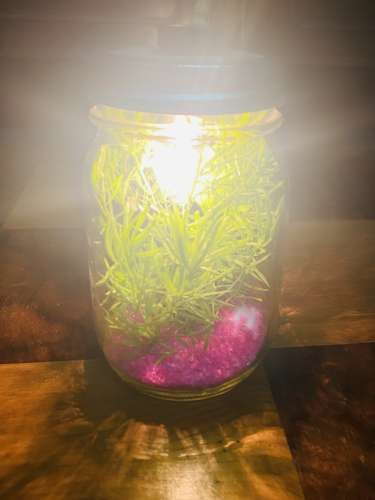
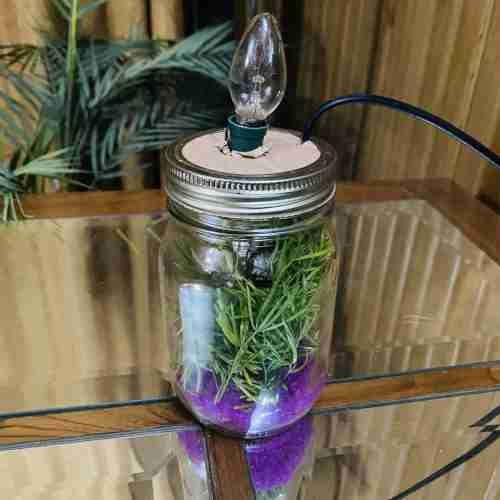
Close the lid, use it as is, or add the decorations such as artificial plants, seashells, stones, etc. Then, light up the bulb and enjoy the simplest mason jar lamp.
Option to add a lampshade:
Now, if you want to make a mason jar lamp using a lampshade, go back to step 2, open the lid, and revert the bulb socket and bulb.
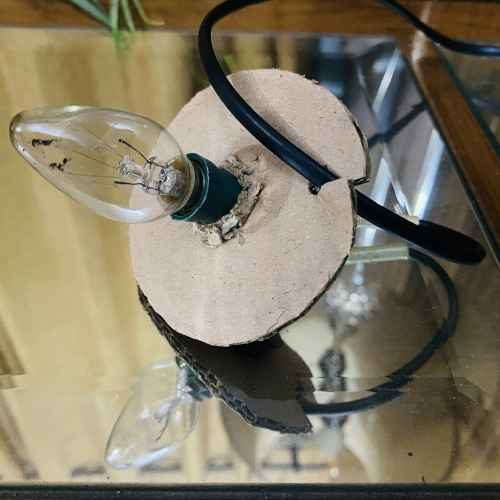
I also incised the cardboard (or the inner lid, if that’s what you’re working with) from the corner for the cord to pass through.
Now, close the lid. Put the lampshade on the jar, and there you have your second interaction with the beautiful mason jar lamp.

How To Make a Tree Branch Lamp?
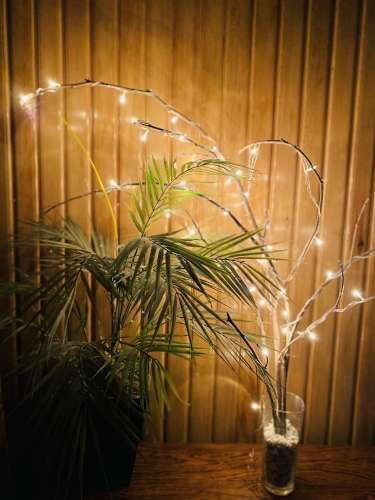
You might have seen those dreamy tree branch light fixtures and lamps on Pinterest. They look really beautiful and are really easy to make.
The best part is that you can make them with any tree branch from your garden. All you have to do is wrap fairy lights around it.
So, let me show you how I make my tree branch desk lamp.
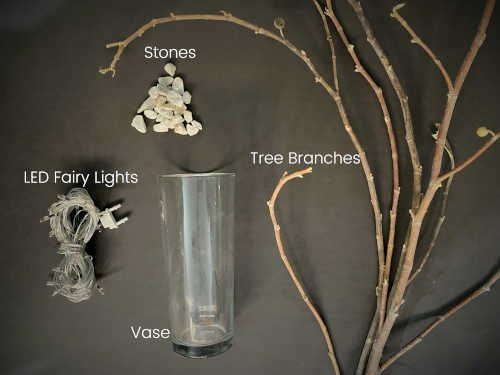
The things that you’ll need for this lamp are:
Let’s get to work:
Step 1:
Find suitable tree branches, and then cut and adjust them according to your liking.
Step 2:
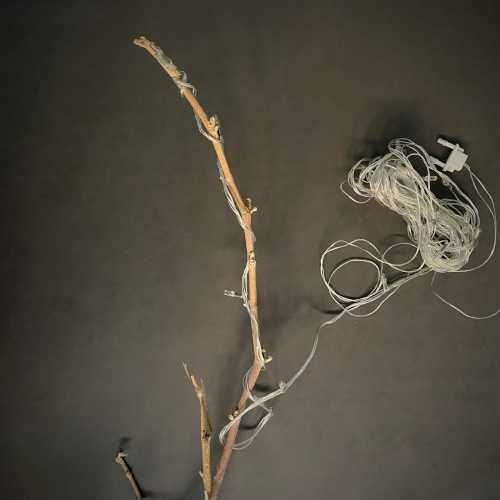
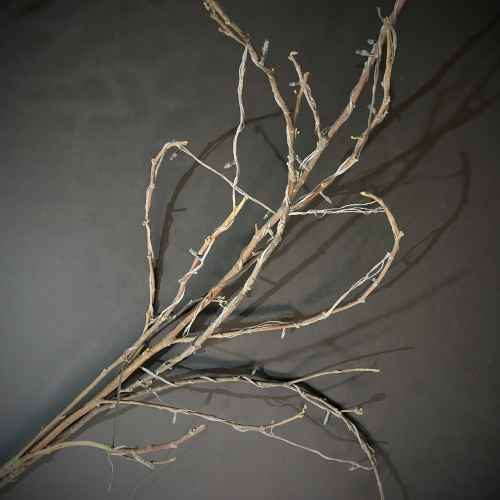
Wrap fairy lights around your branches. Wrap lights around a twig starting at the top, and work your way down.
Then, move to the next one until you’re done with your entire branch.
Step 3:
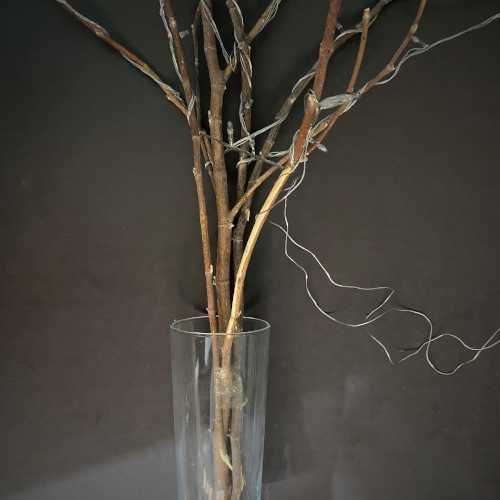
Take a vase and place your branches in it.
Step 4:
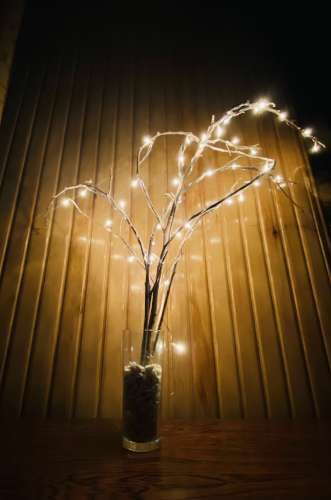
Fill the vase with stones or any other decorative item that adds weight and keeps it in place. Because the branches slant to one side, the vase is likely to topple.
Now turn on the lights and devour your dreamy, Pinterest-worthy tree branch lamp!
How To Make a Desk Lampshade?
Being on a tight budget doesn’t mean you can’t spruce up your living space. You, too, can make beautiful lampshades that will accentuate the feel of your room using items that are readily available and will not break the bank.
Lampshades are the covers that we place on a lamp to soften or direct its light. Lampshades are used for decorative purposes as well. They really amp up the ambiance of your space.
A lampshade, in general, consists of two main components: a light covering and a ring mount that holds it in place.
Lampshades are made in different materials such as:
They are also made in various sizes and shapes, such as:
Oval
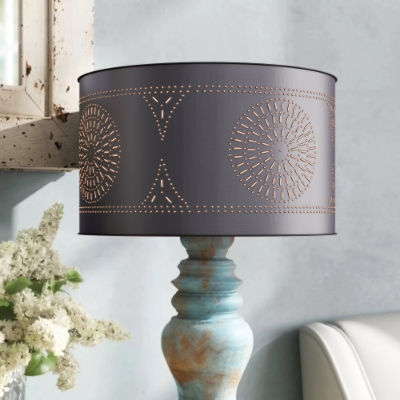
Drum
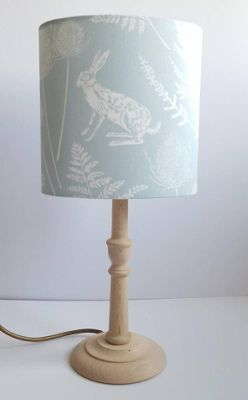
Square
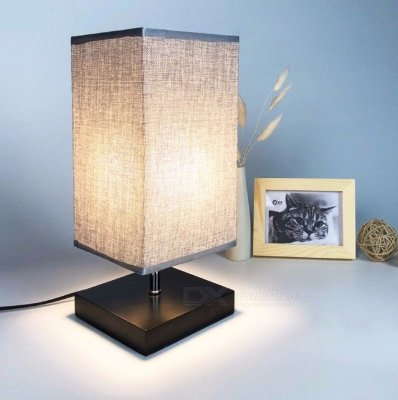
Empire
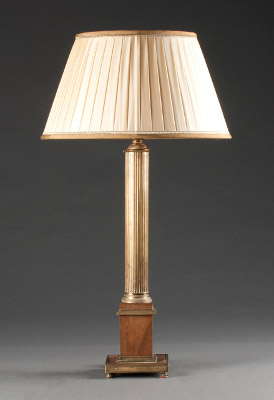
Etc.
For a perfect lamp, you need an appropriate size shade that matches its base. Since lampshade sizes often vary according to different styles, a simple rule of thumb can be used to determine the best shade size for your lamp.
The lampshade should be twice as wide as the base of your lamp and about one-third the height of the lamp.
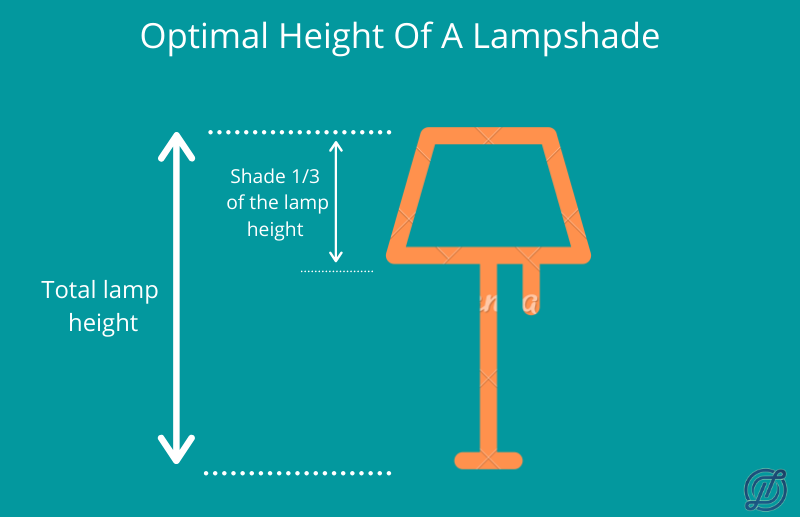
So, for example, if the lamp’s base is around 3-4 inches, as of that mason jar lamp, then the shade should be about 6-8 inches wide. And if the height of the entire lamp structure, including the bulb, is about 12 inches, then its height should be about 4 inches tall.
For more information on lampshades you can visit this link here: https://looneylumens.com/how-to-choose-a-table-lamp/ .
How To Make a Tin Can Desk Lampshade?
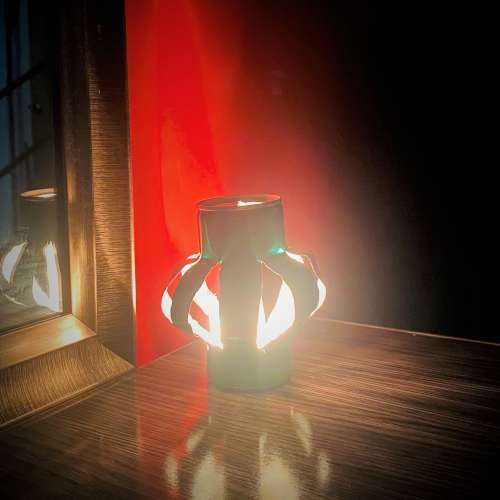
A soft drink tin container can be found in nearly every household. So, the next time you have a drink, don’t throw the can away because we’re going to turn one of those empty tin cans into a lantern. If you use a bigger can, it will also act as a lampshade for your desk lamps.
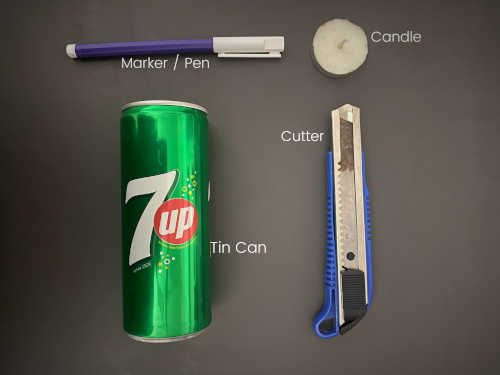
The things that you’ll need for this lampshade are:
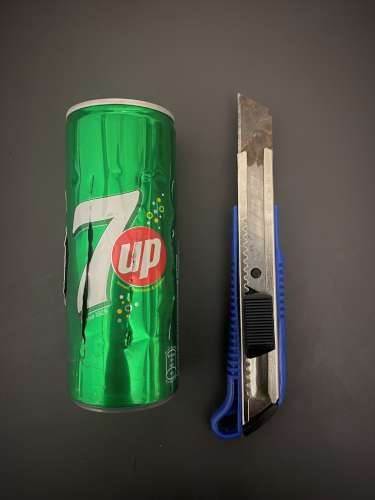
- Soft drink Tin can
- Utility knives/Cutters or can opener
- Candle or battery-powered LED lights (optional)
- Marker or a pen
Let’s get to work:
Step 1:
Wash and dry your soft drink tin can. Also, if you want to cover the branding on your tin can, you can add a coat of spray paint.
Step 2:
Using a can opener or the utility knife/Cutter, cut off the top of the can. (You can skip this step if it’s a bit challenging for you.)
Step 3:
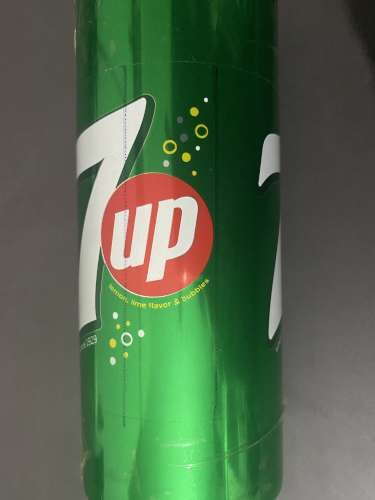
Mark vertical lines on your tin can to indicate where you want the incisions. I spaced the lines by 1″ all around the can, leaving about 1.5 “-2” on top and bottom.
Step 4:
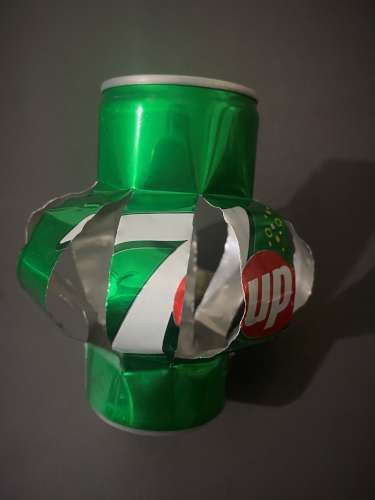
Cut those lines carefully using the cutter. But, be sure to do this step very carefully!
Step 5:
Put pressure on top of the can, and start bending the cuttings outward. Carefully bend the area from where the incision begins at the top and ends at the bottom to make sure that it neatly forms a lampshade-like shape.
Step 6:
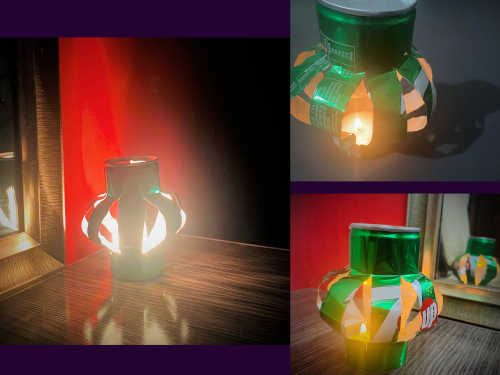
Now, insert the candle in the can, either from the top or through the incisions.
Safety tip!
The sides of the cuts can be very sharp – be super careful!
Preferably use protective gloves.
Step 7:
Light it up and enjoy the beautiful light that passes through this decadent lamp.
Variation:
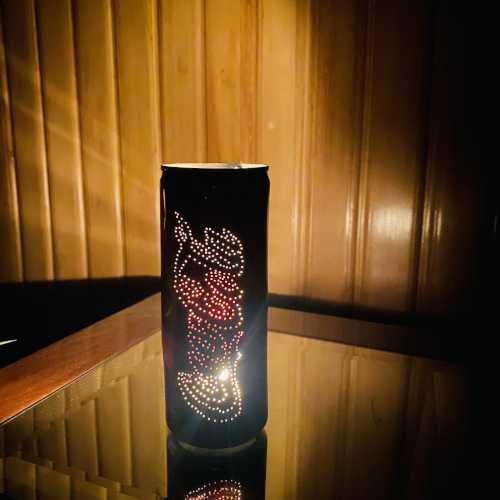
You can also add variations to this lamp by making small holes instead of vertical incisions, as shown in this image.
How To Make a Paper Desk Lampshade?
Did you know that you can make luxurious-looking lampshades with the cheapest and most readily available thing that can be found laying around in our houses?
Paper can be found anywhere and everywhere. You can use newspapers, old paper from your notes, any colored paper, etc. The options are endless and super affordable!
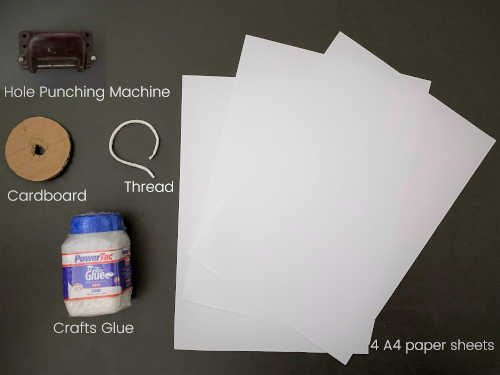
The things that you’ll need for this lampshade are:
- 4 sheets of A4 size paper
- White crafts glue
- Punching machine
- Cardboard (cut into a 2″ radius circle, and then cut 0.5″ radius circle within it: to make a ring)
- Thread/Cord
Let’s get to work:
Step 1:
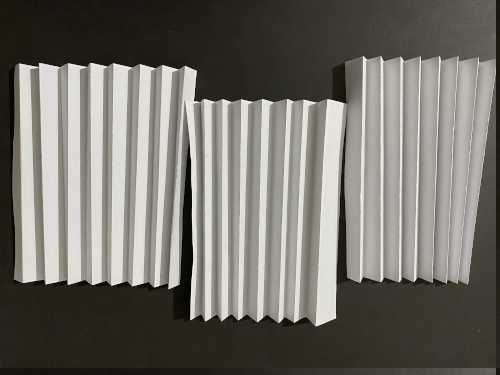
Take a sheet of paper and fold it like a Chinese paper pan. Then similarly fold all four sheets.
Step 2:
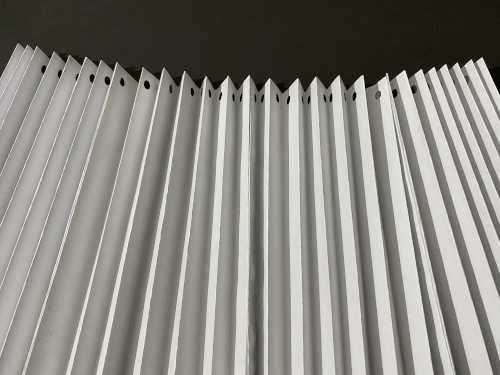
Put glue on the final fold of each sheet and join them together. Then punch holes on top of all the folds using the hole puncher.
Step 3:
Put the thread through all the holes and tie a small knot.
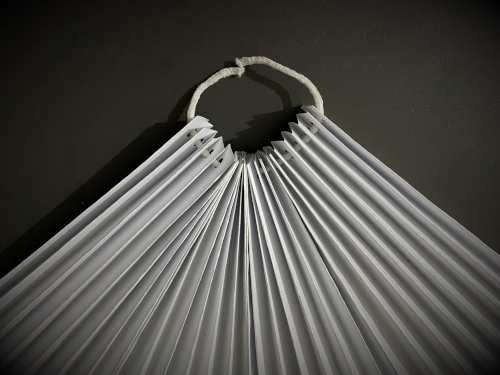
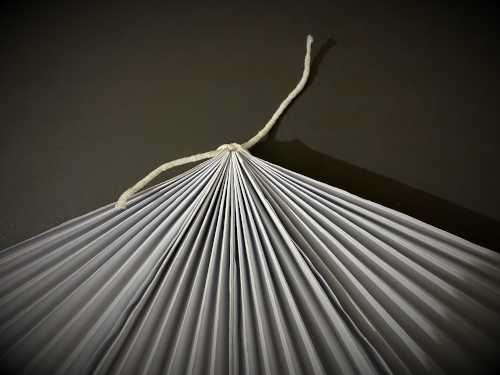
Step 4:
Glue the paper’s edges together to form a circular shape, making sure to pull the knot inward while gluing the sides.
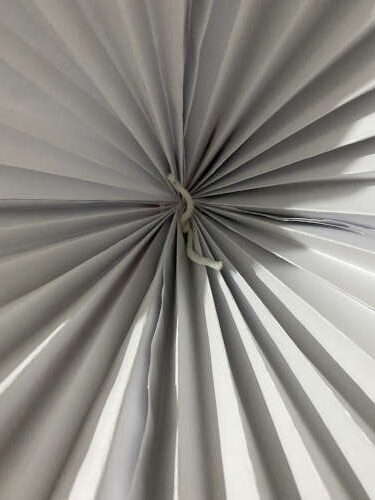
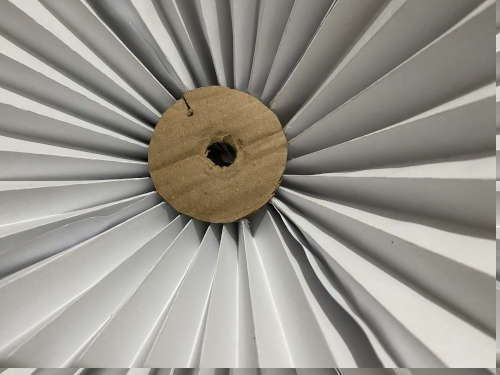
Step 5:
Take that cardboard and put glue all around its edges. Now, put this piece of cardboard inside the paper shade.
The lampshade is now ready. Make sure to use a LED light bulb with this shade as it doesn’t get too hot.
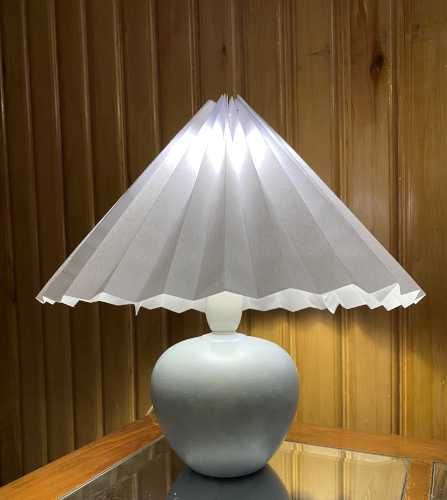
This is what the final lampshade looks like.
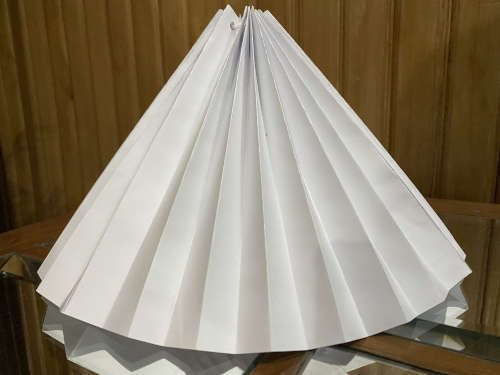
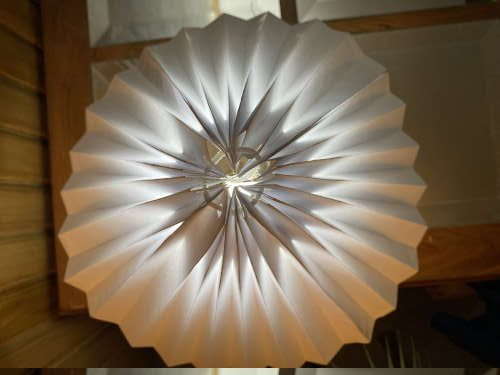
Now, put this lampshade on your lamp and enjoy the beautiful light peeking through it.

I hope you enjoy making these dreamy desk lamps as much as we did.
Learn more about lamps and how to make the best use of them by clicking below!
Other Useful Links
Author: Aleena Najeeb

Aleena is an MBA graduate who has been working in content creation, content writing, and the marketing industry for the past three years. She has worked for numerous clients over the years, specializing in the home decor, fashion, and marketing niche. In addition, she has a knack for interior design and loves creating DIY crafts and art.
